Eğitim
A Step-by-Step Guide to Data Cleaning Techniques in Excel
Learn how to clean your data effectively in Excel with step-by-step techniques. From removing duplicates and trimming spaces to using Power Query and data validation, this guide will help you organize and analyze your data like a pro.
Elbette! Aşağıda blog yazının tamamının İngilizce çevirisini bulabilirsin. Başlıklar, açıklamalar, örnekler ve tüm detaylar SEO dostu şekilde çevrilmiştir:
Microsoft Excel is a powerful tool for data analysis and reporting. However, raw data often comes in disorganized, incomplete, or erroneous formats. That’s why data cleaning is a skill every proficient Excel user must master.
In this blog post, we’ll walk through the most effective data cleaning techniques in Excel, step by step, with real-world use cases and practical tips to help you clean your data quickly and accurately.
What is Data Cleaning?
Data cleaning is the process of identifying and correcting (or removing) inaccurate, incomplete, duplicate, or irrelevant data.
Working with clean data is essential for accurate analysis and reliable decision-making.
8 Essential Data Cleaning Techniques in Excel
1. Find and Fill Blank Cells
Explanation:
In large data sets, missing values are common. These blank cells can interfere with calculations and break formulas.
Why it’s needed:
- To detect missing order information in sales sheets
- To identify unanswered questions in survey data
- To ensure complete records before generating reports
How to do it:
- Click on any cell within your table.
- Press F5 → “Go To Special” → Select “Blanks”.
- Enter values or delete blank rows in bulk.
2. Combine Data Using TEXTJOIN, CONCAT, or CONCATENATE
Explanation:
Sometimes, values like first name and last name are stored in separate columns. Combining them makes reports and forms more readable.
Why it’s needed:
- To prepare mailing or contact lists
- To print full names on invoices or ID cards
- To display information in a single column
How to do it:
If A2 = “John” and B2 = “Smith”:=TEXTJOIN(" ", TRUE, A2:B2)
or=A2 & " " & B2
3. Remove Unnecessary Spaces with the TRIM Function
Explanation:
Extra spaces (especially invisible trailing or leading spaces) often sneak into cells during data entry. These can break lookups and comparisons.
Why it’s needed:
VLOOKUP,MATCH, andIFfunctions may return errors- Sorting and filtering won’t work properly
- Data validation and consistency are compromised
How to do it:
Use =TRIM(A2) to remove extra spaces.
Then copy and paste as values if needed.
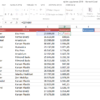
4. Remove Duplicate Records
Explanation:
Duplicate entries inflate results and distort analysis. This is common in customer lists, HR data, and product catalogs.
Why it’s needed:
- To ensure each record is unique in analysis
- To clean up mailing or contact lists
- To avoid double-counting in reports
How to do it:
- Select your data.
- Go to the Data tab → Click Remove Duplicates.
- Choose the columns to check for duplicates.
5. Handle Errors Gracefully with IFERROR
Explanation:
Formulas can return errors like #DIV/0!, #N/A, or #VALUE!. These can be confusing or look unprofessional in reports.
Why it’s needed:
- To prevent users from seeing error codes
- To provide context with a friendly message
- To keep formulas from breaking down your dashboard
How to do it:
Example:=IFERROR(A2/B2, "Invalid calculation")
6. Format Dates and Times Correctly
Explanation:
Excel stores dates as numbers. Improper formatting or inconsistent input can cause incorrect sorting or filtering.
Why it’s needed:
- To ensure correct date-based analysis and grouping
- To fix inconsistently formatted time logs
- To calculate time intervals accurately
How to do it:
- Select the cells.
- Right-click → Format Cells → Choose “Date” or “Custom”.
7. Use Data Validation to Control Input
Explanation:
Controlling what users can enter into a cell helps maintain consistency and avoids errors at the source.
Why it’s needed:
- To limit input to specific ranges or values
- To ensure data fits reporting standards
- To enforce dropdown lists for clean input
How to do it:
- Select the target cells.
- Go to Data → Data Validation → Define your rule (e.g., whole numbers between 1 and 100).
8. Automate Cleaning with Power Query
Explanation:
Manually cleaning large datasets is time-consuming and error-prone. Power Query allows you to automate these steps and reuse them.
Why it’s needed:
- To save time when working with thousands of rows
- To automate transformations like splitting columns, removing blanks, or filtering
- To refresh and clean updated data with one click
How to do it:
- Go to Data → Get & Transform Data → “Launch Power Query Editor”.
- Apply steps like trimming, removing rows, and formatting.
- Save and load your cleaned data.
Bonus Tips for Cleaner Data
- Always keep a backup before cleaning data.
- Test small samples before applying changes to the whole sheet.
- Clean data = reliable analysis = smarter decisions.
Final Thoughts
Whether you’re preparing a sales report or cleaning survey results, data cleaning is the first and most crucial step in any Excel workflow.
By using these techniques, you can make your spreadsheets more reliable, accurate, and professional.
Want to learn more about Excel? Check out our advanced Excel video trainings at Vidoport.com and start mastering the tools that will boost your productivity.
Suggested Tags
- Excel Data Cleaning
- Power Query in Excel
- IFERROR Function
- Remove Duplicates
- Data Validation Excel
- Excel Tips and Tricks
- Excel Training Online